Adobe Marketo Engage Setup & Usage Guide
This guide shows how to:
- Add SendForensics as a contact/recipient in Marketo.
- Confirm the Marketo credentials required for the integration.
- Enter the credentials in SendForensics and activate the integration.
- Introduction
- Add SendForensics as a contact in Marketo
- Configure Marketo for integration
- Activate the Marketo integration within SendForensics
- Enjoy using the new workflow!
- Troubleshooting
Note: The ESP's API can change unexpectedly from time to time, and there may also be variations within individual ESP accounts. If you are having any trouble connecting or with integration features, please raise a ticket with our friendly Support team who will help you through it.
1. Introduction
The SendForensics system needs to become another recipient of your emails (in the same way as any other customer) to be able to analyze your deliverability properly:
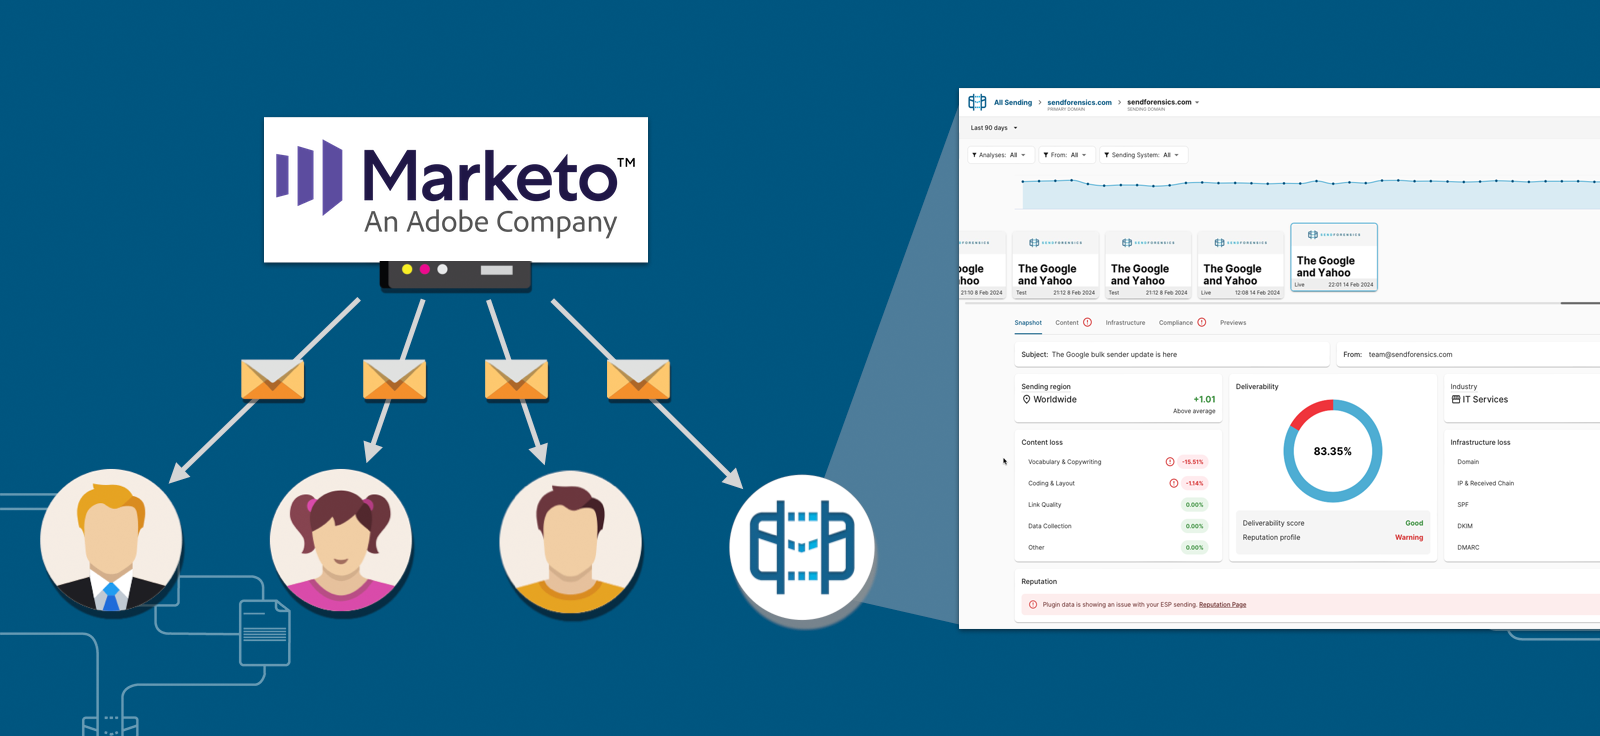
So when you send a campaign email (one to many), you will need to include your unique SendForensics analysis address (user menu > Addresses) in the list of recipients.
The integration then allows the automated analysis of your Marketo engagement data* to complete the deliverability picture:
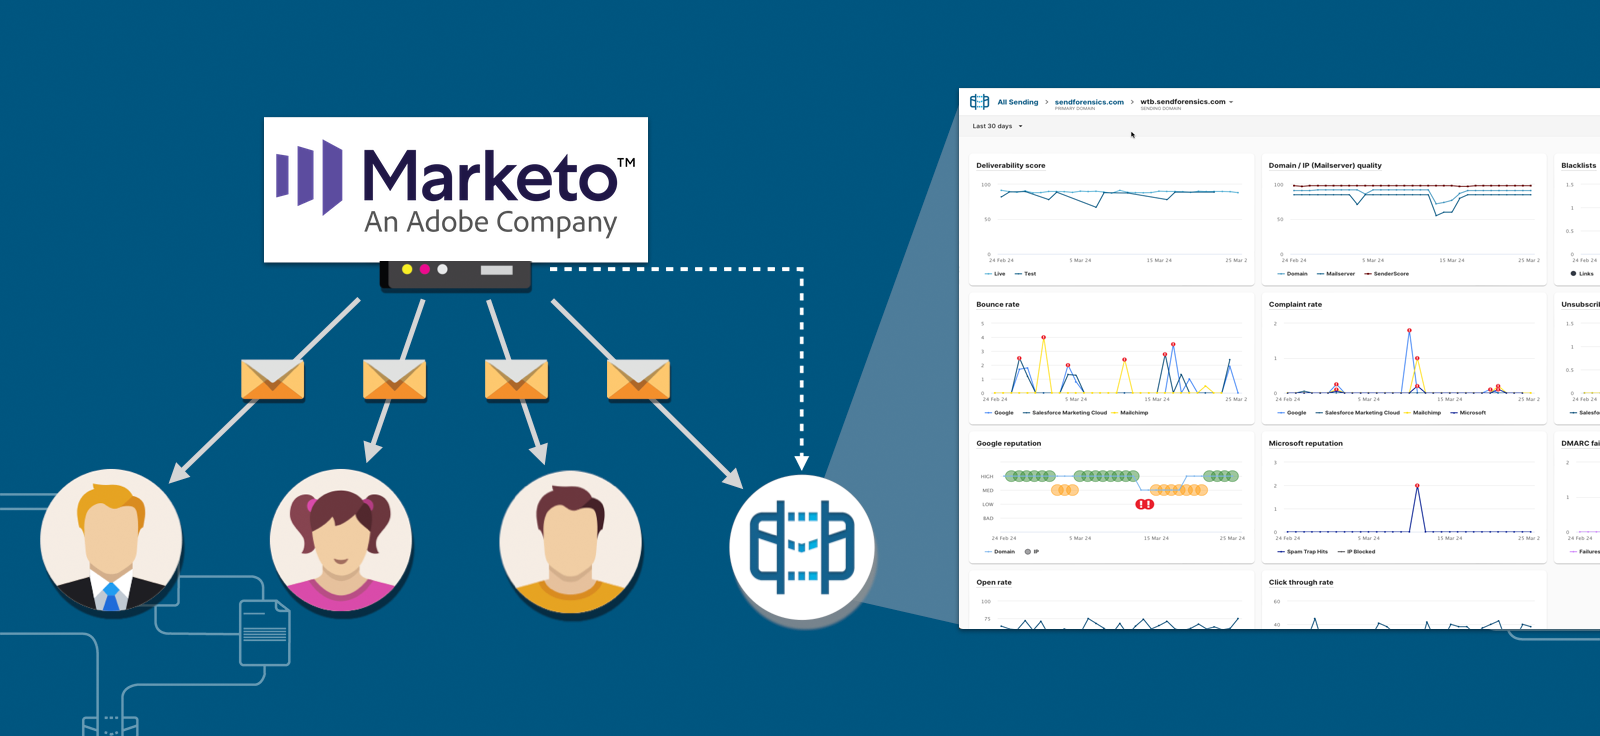
*Anonymous, aggregated email marketing metrics containing no personally identifiable information (PII). More information »
2. Add SendForensics as a contact/recipient in Marketo
First locate your unique SendForensics analysis address within your SendForensics account (user menu > Addresses):
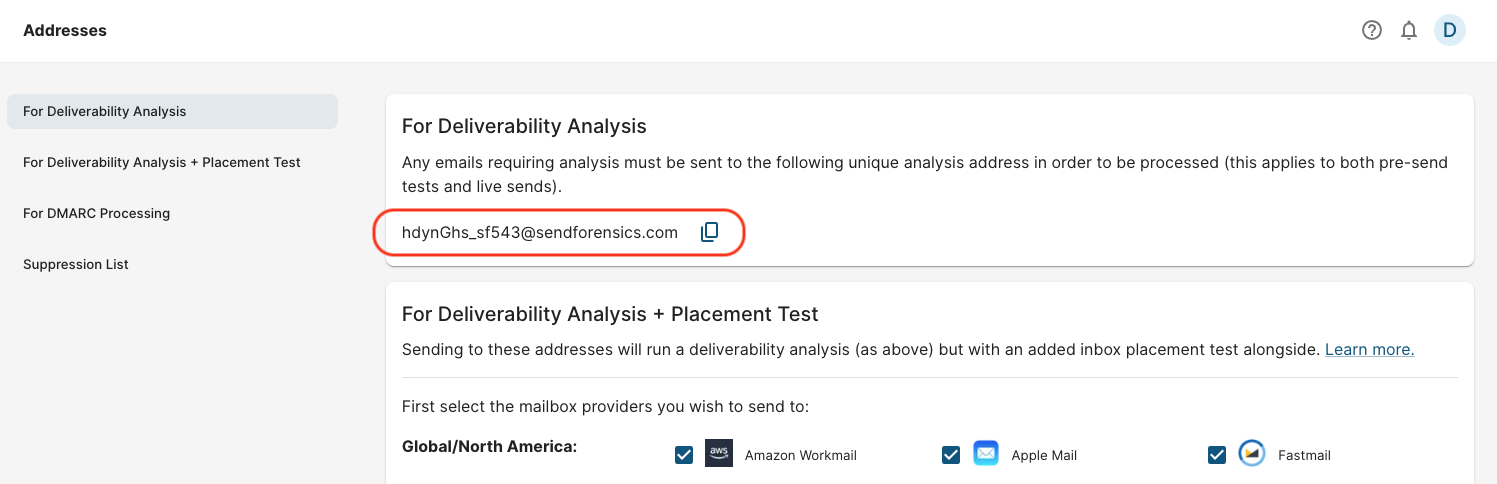
Now copy this unique analysis address and add it as a new contact in Marketo.
We would suggest creating a new list/segment just for this contact, calling it something recognizable such as 'Deliverability Testing' so it can be easily included in all live sends, and also used for pre-send tests.
Now whenever you send an email campaign with Marketo, always include this list/segment/contact and the SendForensics system will receive a live copy for analysis.
To additionally run a placement test if required, you will need to add the full seedlist of addresses in the "For Deliverability Analysis + Placement Test" section in the same way.
3. Configure Marketo for integration
The Adobe Marketo Engage integration in SendForensics requires the following fields:
- Base URL
- Client ID
- Client Secret
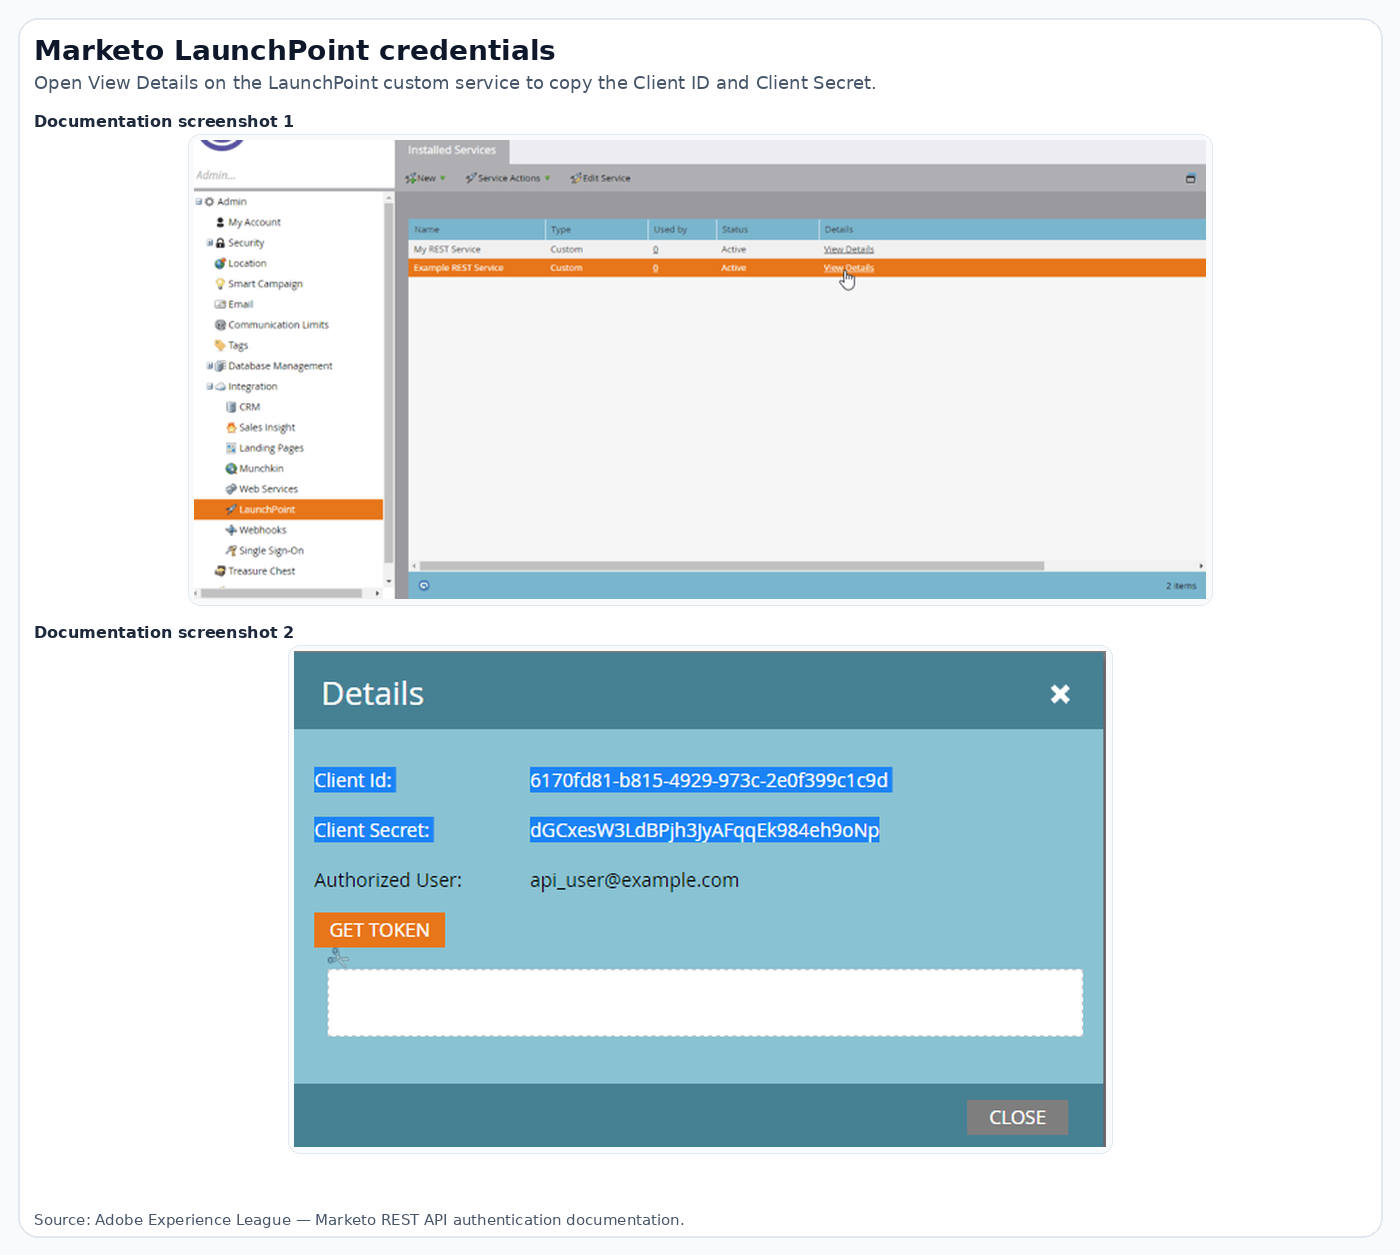
Marketo’s REST API uses a LaunchPoint custom service tied to an API-only user. A Marketo administrator should create or confirm the API-only user, role, and LaunchPoint custom service before you activate the integration.
To find the Client ID and Client Secret:
- In Marketo Engage, go to Admin → Integration → LaunchPoint.
- Create a new custom service for SendForensics, or open the existing service created for this integration.
- Click View Details.
- Copy the Client ID and Client Secret.
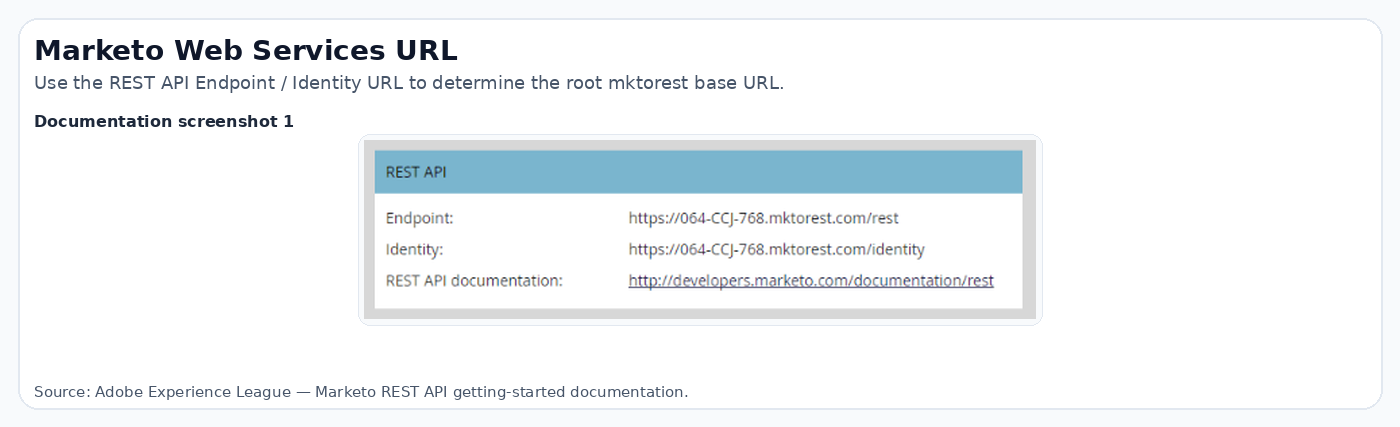
To find the Base URL:
- In Marketo Engage, go to Admin → Integration → Web Services.
- Find the REST API section.
- Copy the root URL from the Endpoint or Identity URL.
For example, if Marketo shows https://123-ABC-456.mktorest.com/rest or https://123-ABC-456.mktorest.com/identity, enter https://123-ABC-456.mktorest.com as the Base URL in SendForensics.
Security note: Treat the Client Secret like a password. Store it securely and only share it with trusted administrators.
3. Activate the Marketo integration within SendForensics
- In SendForensics, go to Integrations and select Marketo.
- Enter your Marketo Client ID, Client Secret, and Base URL.
- Click Activate integration.
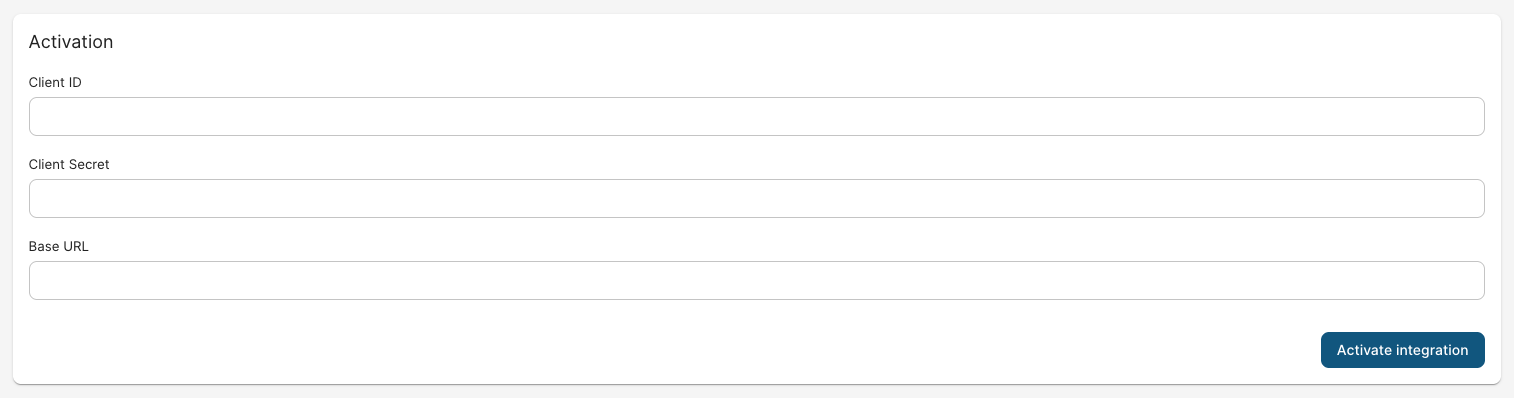
Once activated, SendForensics validates the credentials and automatically determines the correct Marketo instance URL.
On successful activation, the system will pull in the engagement data for all campaigns (after the date of activation) that have a corresponding analysis in the system (by being a recipient as per Step 1. Add SendForensics as a contact in Marketo).
4. Enjoy using the new workflow!
Campaign sends (one to many)
Each time you create a new campaign and are ready to send live, first send a test to your unique SendForensics analysis address for pre-emptive deliverability analysis.
After receiving it, the system will process your email and display the full deliverability analysis results within your (SendForensics) dashboard. It will be marked as a 'Test' send where detected (if it is mistakenly marked as a 'Live' send, use the Test/Live switch to correct it).
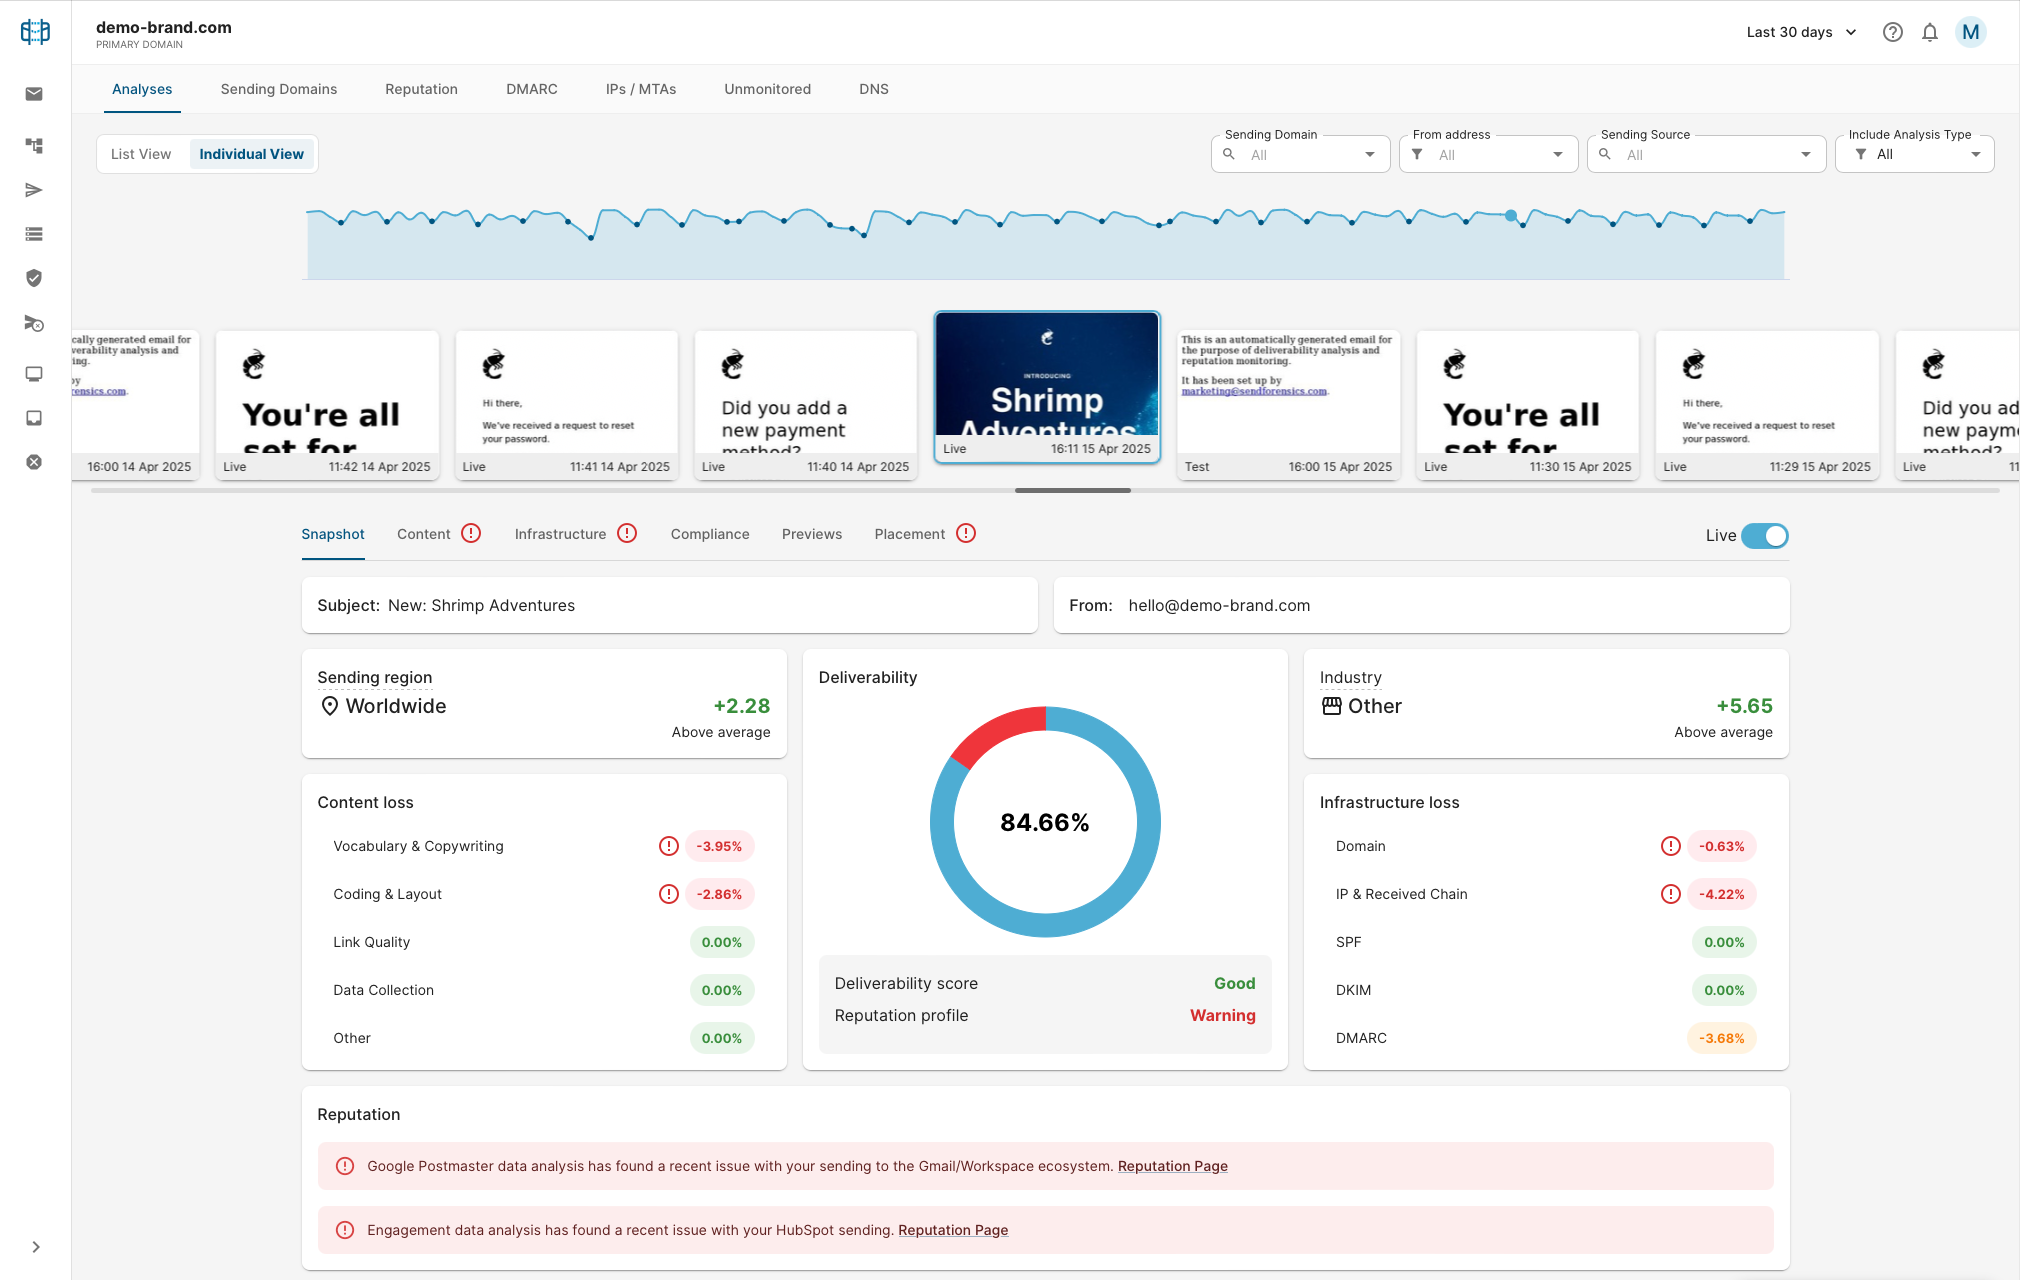
Cycle through the tabs (Content, Infrastructure etc) following the advice and recommendations to optimize the deliverability of your email as much as possible, re-testing as necessary. When you have reached a comfortable deliverability score (vs amount of work needed to improve it further), the campaign can be sent live.
The live send will also be processed (as a result of Step 1 above), and will additionally contain an analysis of your engagement data (live results):
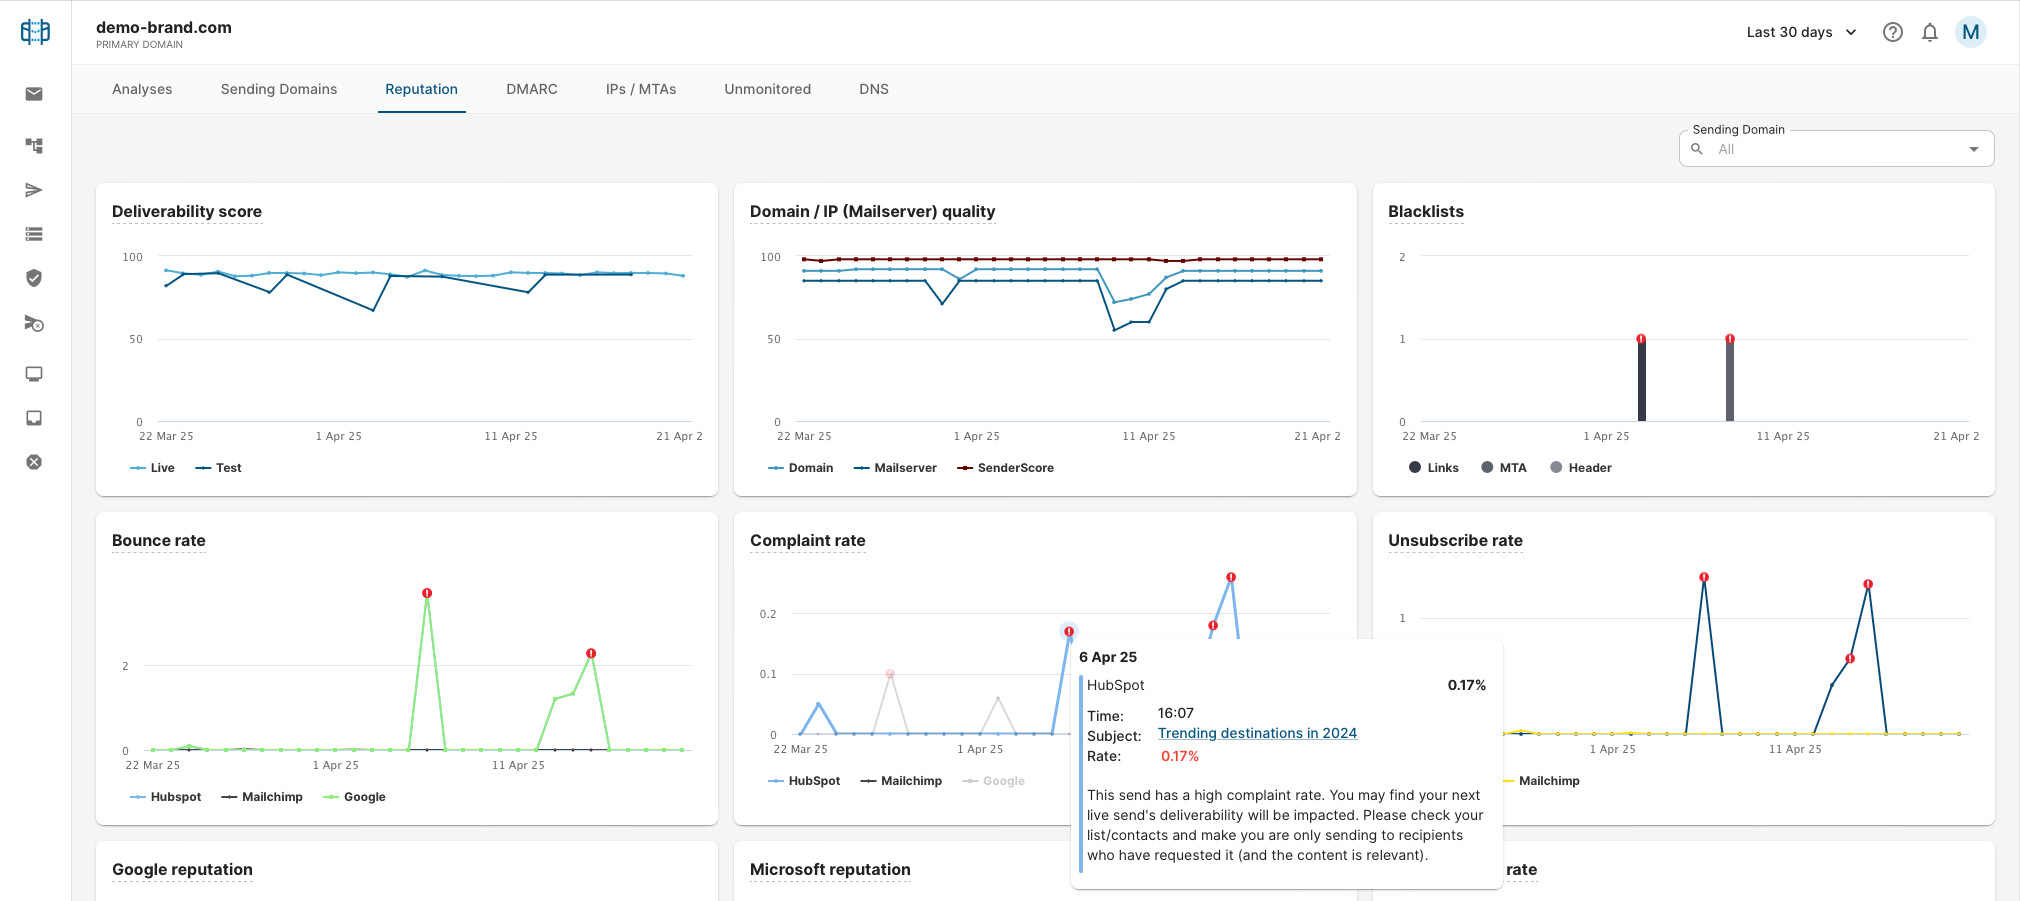
Click on any of the bounce/complaint/unsubscribe graph points to click through to the campaign email responsible for those results. Any reported issues with these metrics especially should be acted on and corrected before the next live send.
Troubleshooting
Invalid credentials / authentication errors
- Re-check the Client ID, Client Secret, and Base URL. for copy/paste errors.
- Confirm the Marketo user is enabled.
- Confirm the user has the required API and reporting permissions.
- If the password was recently changed, update the integration credentials and activate again.
Connected, but data is missing
- Confirm you are viewing a date range where there is Marketo campaign activity.
- Confirm the campaign was sent from Marketo to the SendForensics seedlist contacts/list/segment.
- Confirm link tracking is enabled so the campaign identifier can be detected from the received seed message.
- Confirm the campaign is within the reporting window available from Marketo’s Campaign Analysis reporting API.