Postmark Setup & Usage Guide
- Introduction
- Activate the Postmark integration within SendForensics
- Enable automated template triggering
- Enjoy using the new workflow!
Note: The ESP's API can change unexpectedly from time to time, and there may also be variations within individual ESP accounts. If you are having any trouble connecting or with integration features, please raise a ticket with our friendly Support team who will help you through it.
1. Introduction
The SendForensics system needs to become another recipient of your emails (in the same way as any other customer) to be able to analyze your deliverability properly:
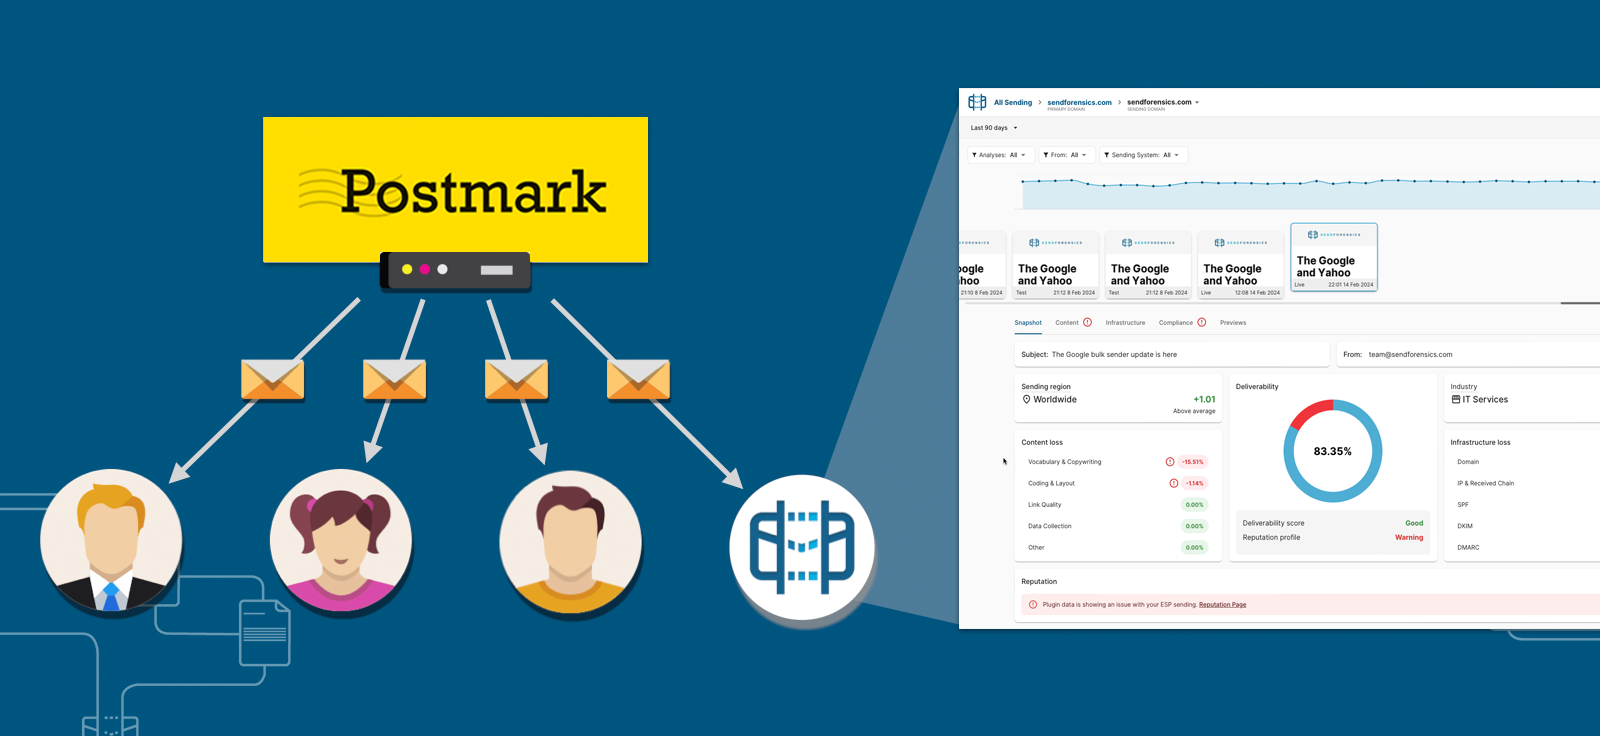
So when you send a campaign email (one to many), you will need to include your unique SendForensics analysis address (Account > Addresses) in the list of recipients. For transactional/marketing-automation type emails (one to one), you can use the automated template triggering functionality so that templates are automatically sent to your unique SendForensics analysis address on a daily or weekly basis.
The integration then allows the automated analysis of your Postmark engagement data* to complete the deliverability picture:
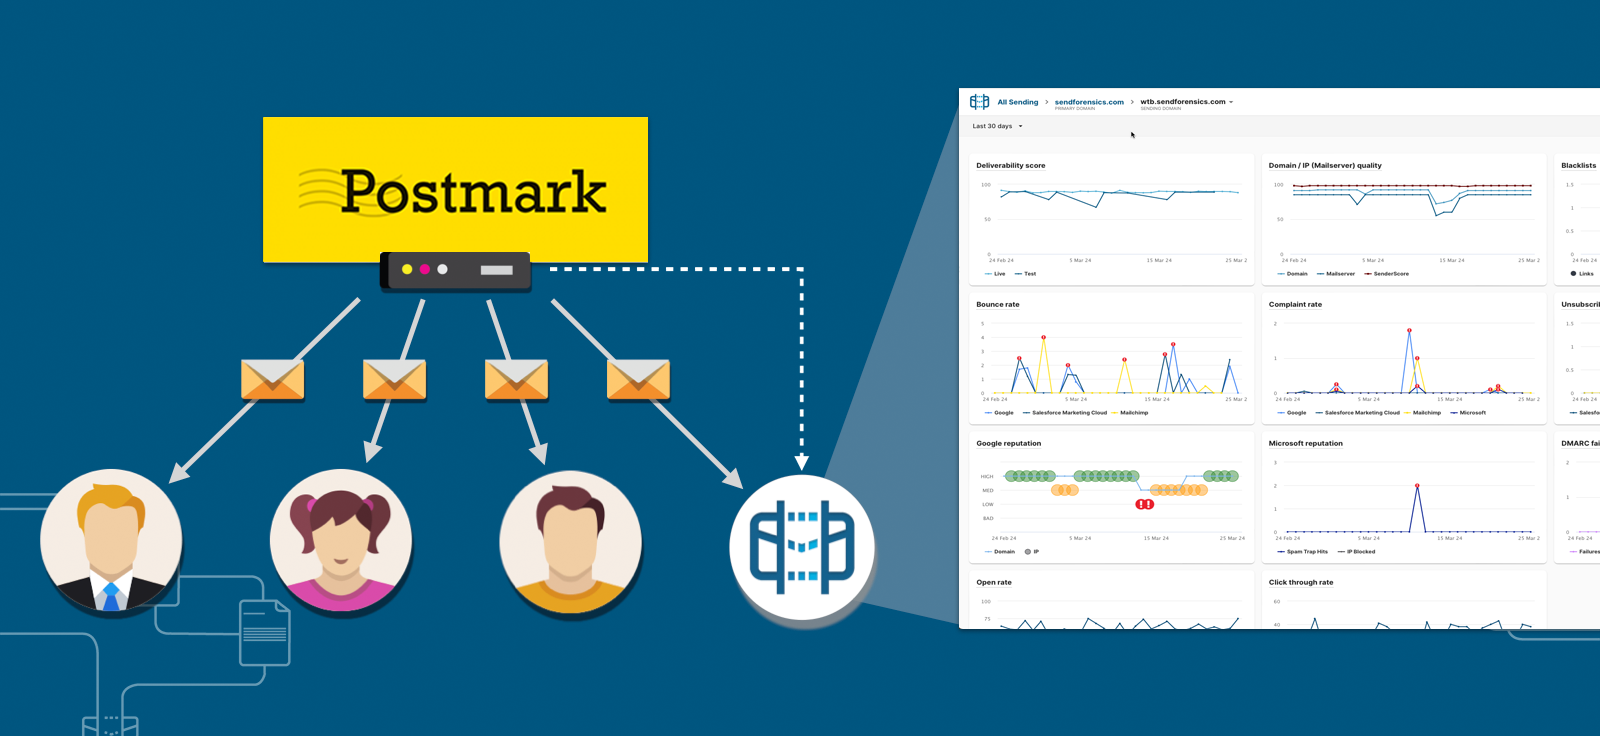
*Anonymous, aggregated email marketing metrics containing no personally identifiable information (PII). More information »
2. Activate the Postmark integration within SendForensics
To enable our Postmark integration, you will need to generate an API key and Stream ID from your Postmark account.
1. Login into your Postmark account, on the main menu, click on Account.
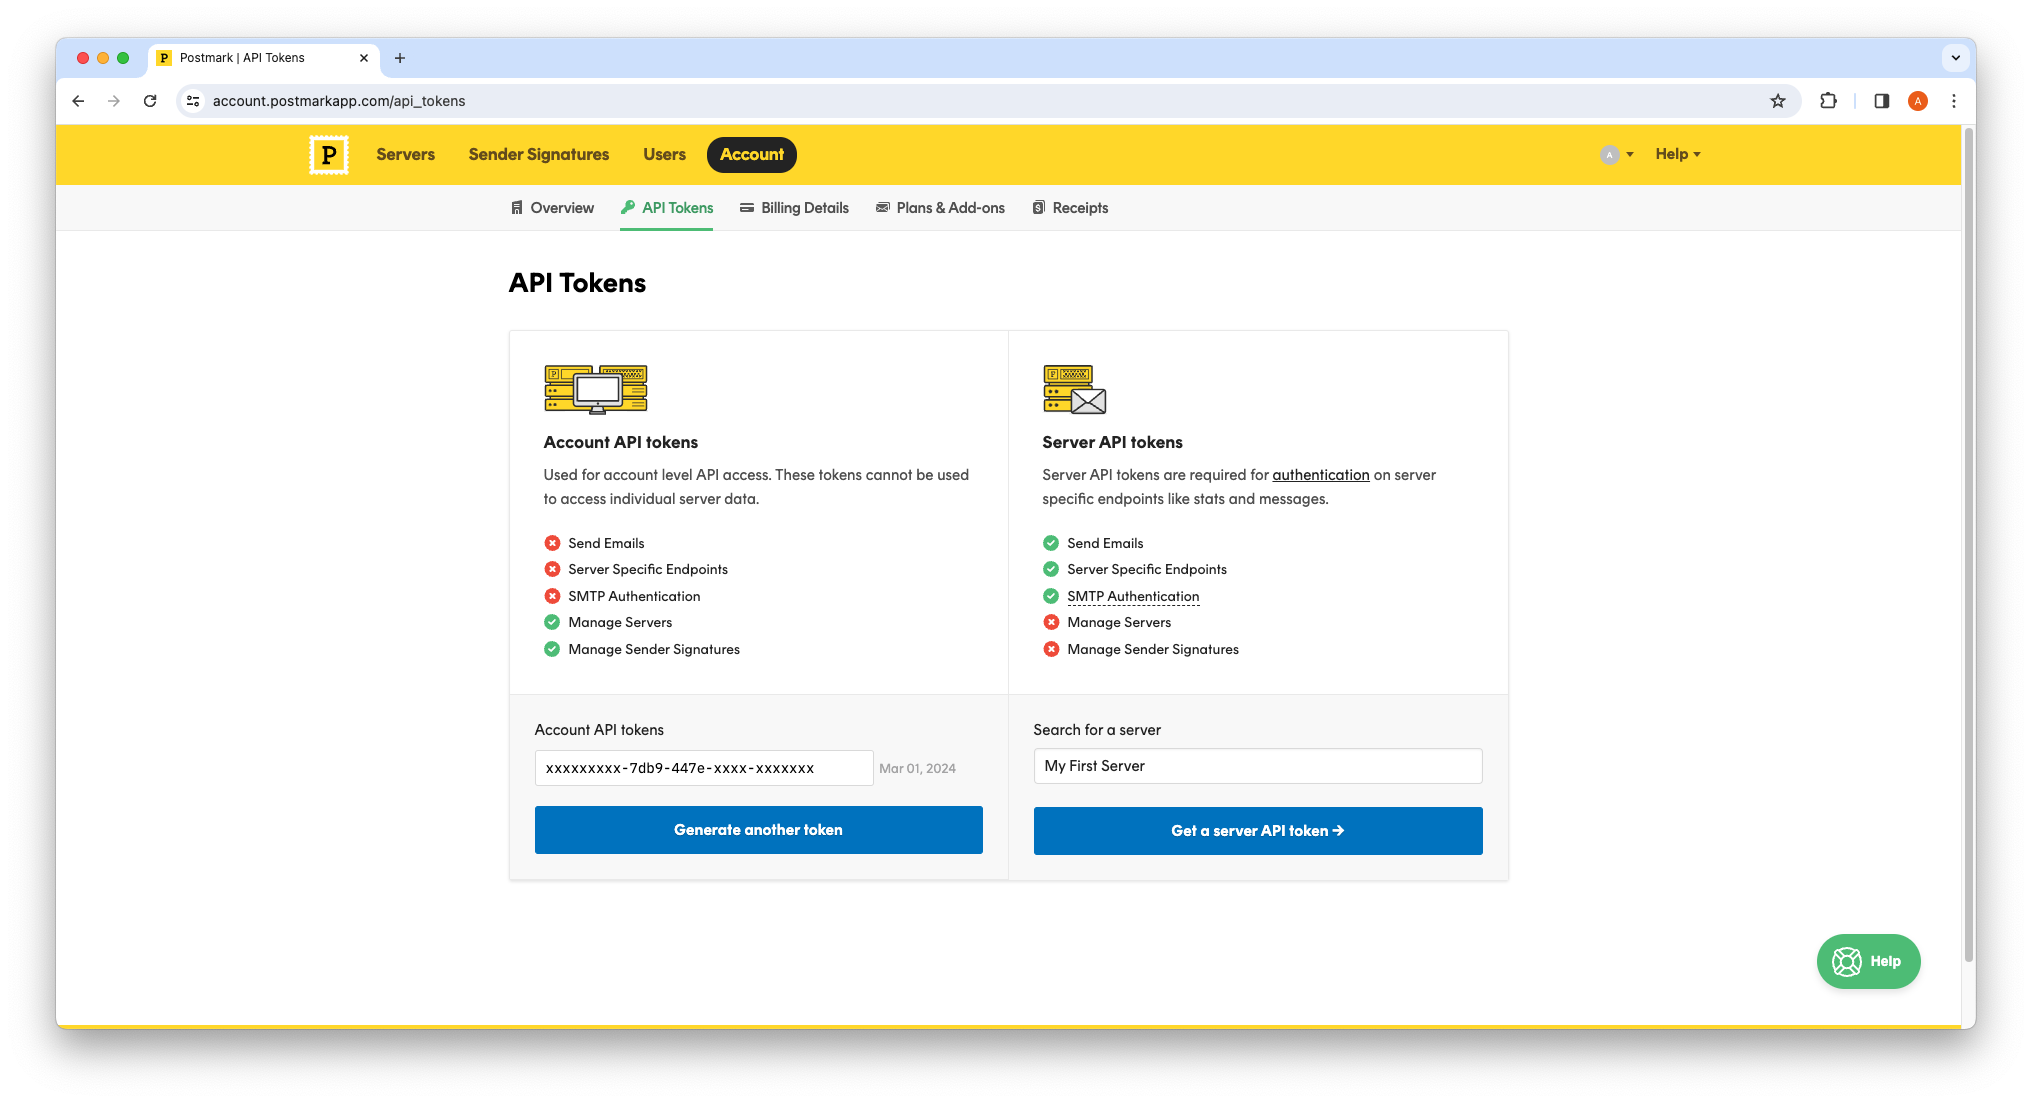
2. Click on API Tokens tab. Type the server name that you want SendForensics to analyse the engagement data for and and click Get a server API token.
3. Once the API is generated, copy the Server API token.
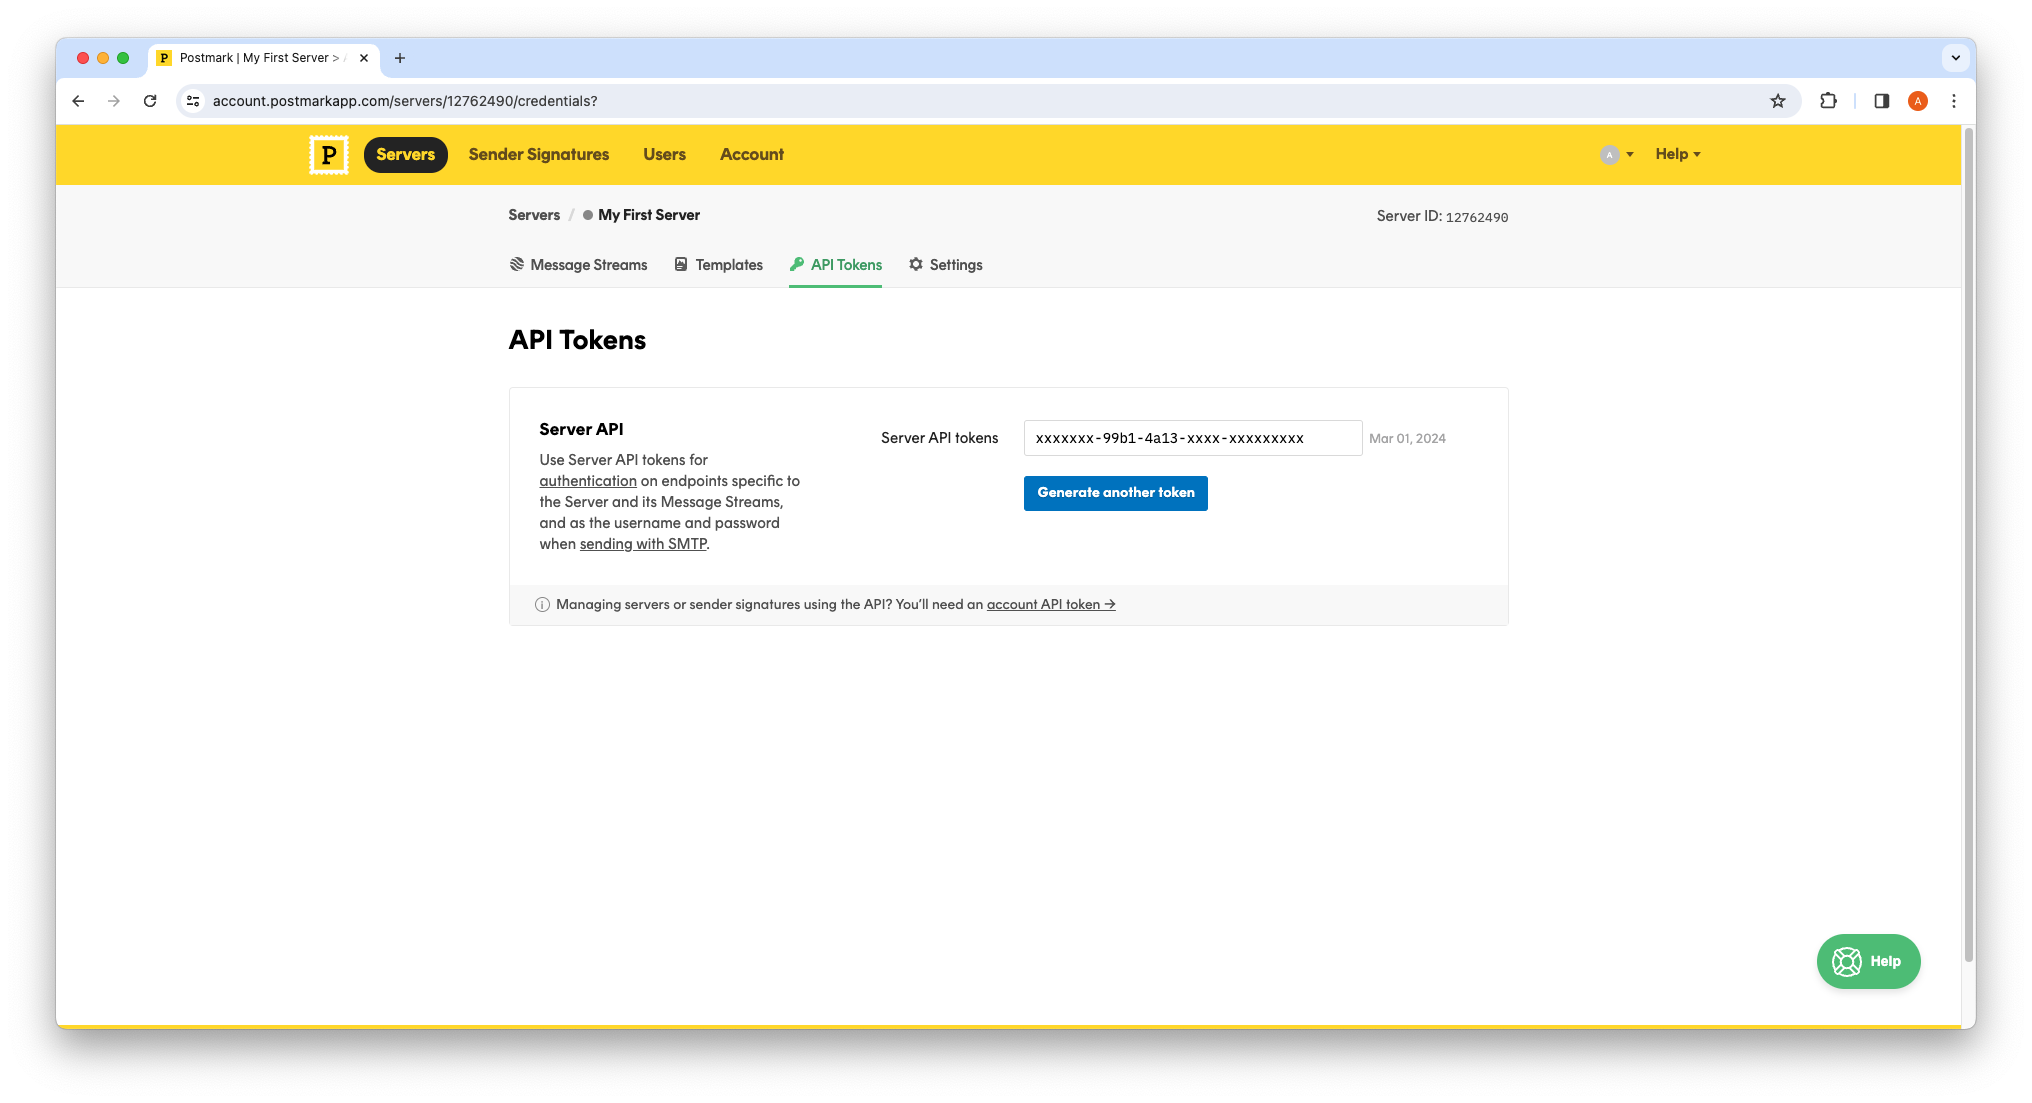
4. Login into your SendForensics account, visit the domains page. (Profile icon > Domain settings)
5. Click on the desired domain and go to ESP Integrations.
6. Click on Add integration and select Postmark.
7. Paste your Server API token. Click on Activate integration.
Once activated, go back to your Postmark account and click on the Message Stream(s) that you would like SendForensics to analyse, making sure the type is either Broadcasts or Transactional. SendForensics can analyse the engagement data from one Broadcast sream and one Transactional stream per sending domain. Copy the Stream ID located on the top right of the page.
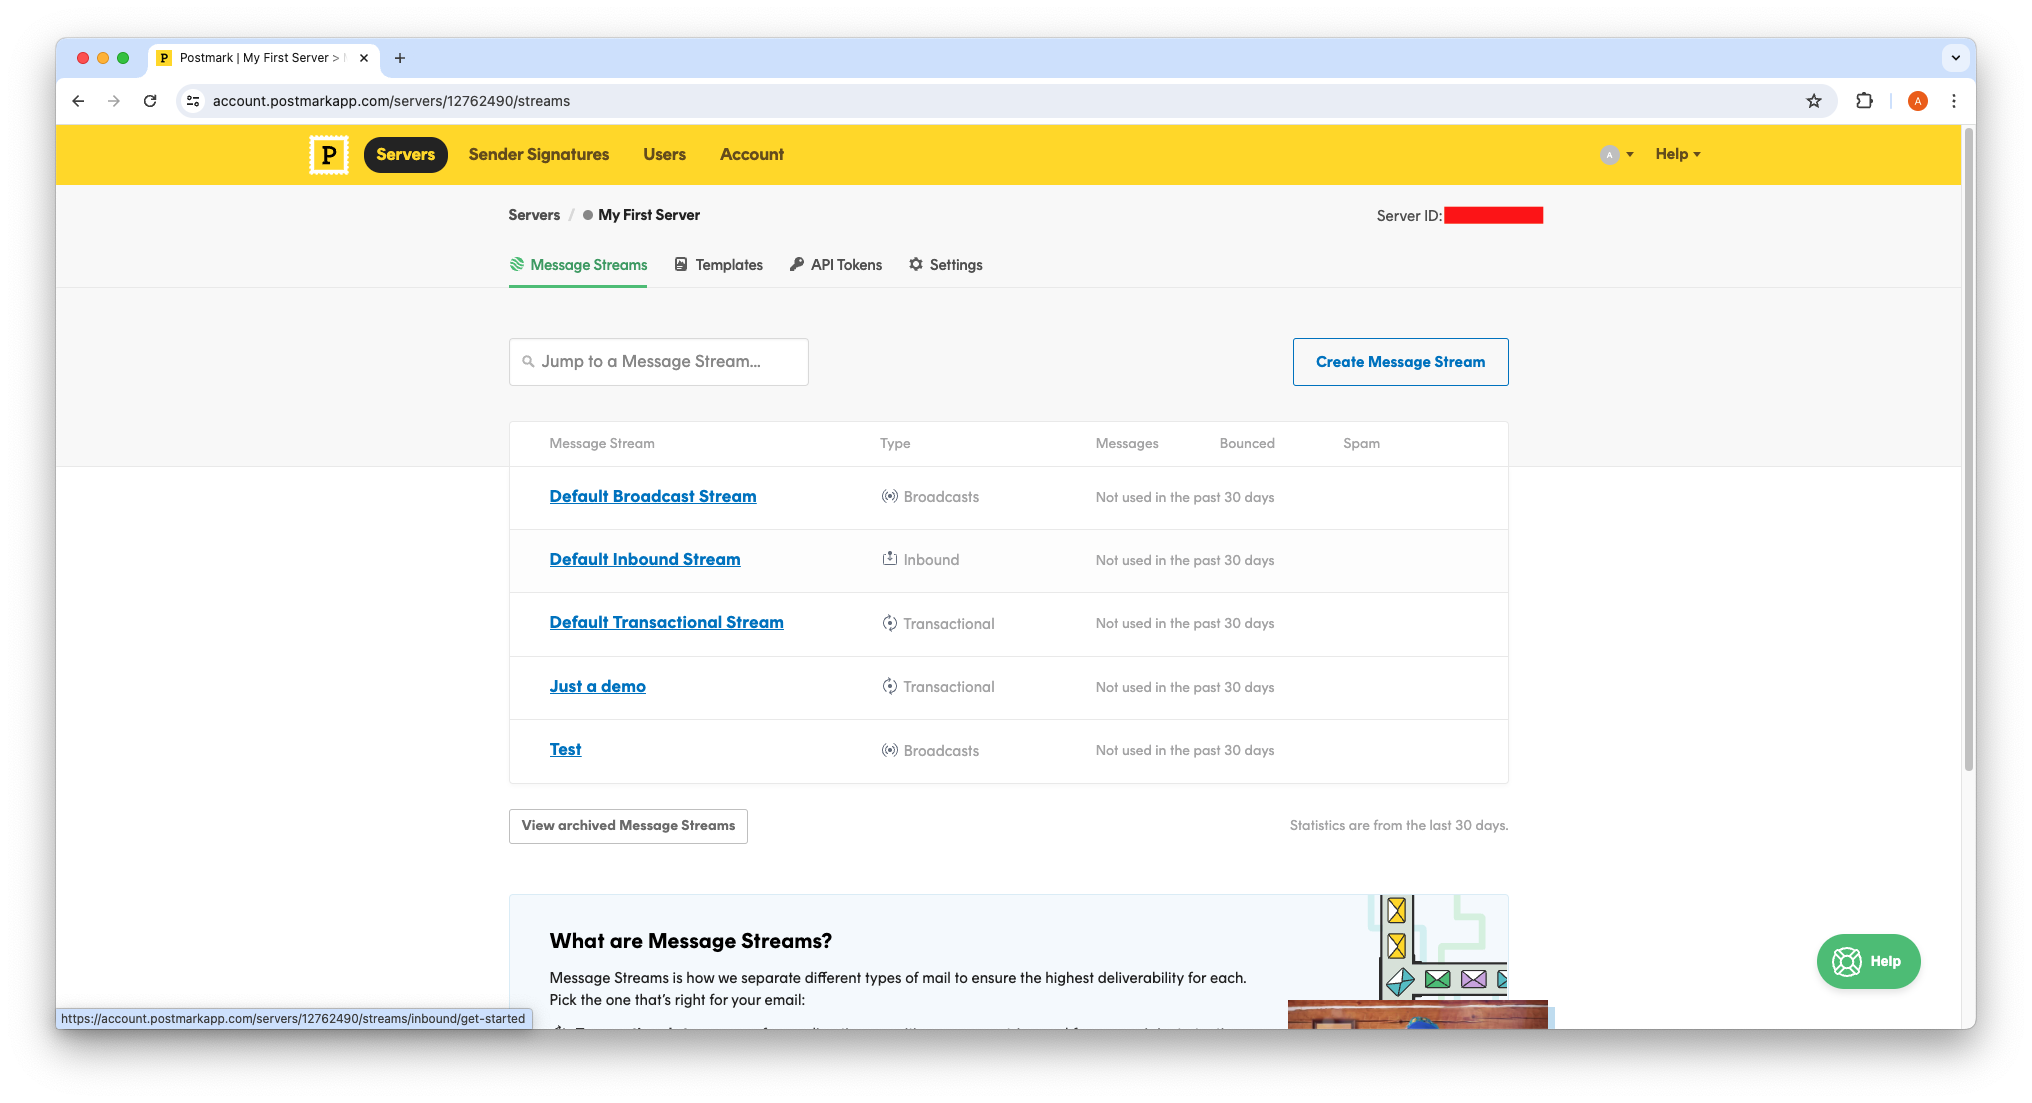
If it is a Broadcast type, then paste into the Campaigns Stream ID field and click save. SendForensics will then pull in the engagement data for analysis for all campaigns (after the date of activation) that have a corresponding analysis in the system.
If it is a Transactional type, then flick the "Enable for this sending domain" to enable pulling in transactional data for this sending domain. Paste into the Transactional / Marketing-Automation Stream ID field and click save. SendForensics will then pull in daily engagement metrics for any transactional/marketing-automation (one-to-one) sending from this particular sending domain. You can switch this off using the "Enable for this sending domain" switch if:
- You do not use this ESP for transactional/marketing-automation sending, or
- If you are sending your transactional/marketing-automation sends from a different sending domain. In this case then you will also need to activate the integration separately for this other sending domain (you should be able to use the same API key).
Note: Engagement data is pulled in for analysis once per day, so there may be a delay between activating the integration and receiving the first batch of data.
3. Enable automated template triggering
If you are using Postmark to send transactionals and/or marketing-automation messages, you can automatically trigger the templates on a daily or weekly basis for continual analysis and monitoring by the platform.
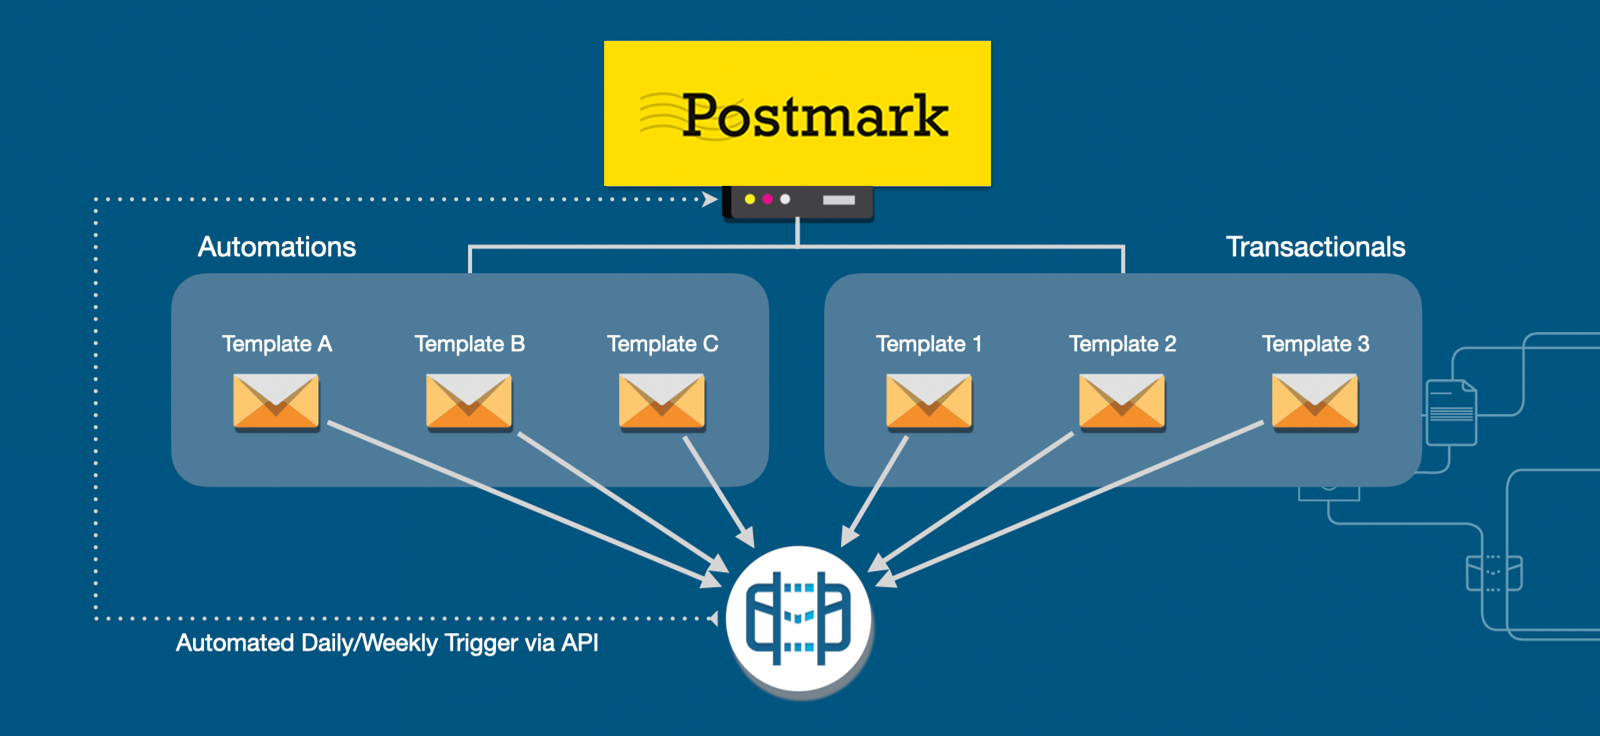
Enter the details of the first template, with some sample variables if required, then try a test send using the "Send test" button. This should successfully trigger an email using this template to be sent to the platform. You should get a new message notification from the envelope icon on the top right of the screen. Click this to view the analysis.
If you are happy with the test send, then simply select the sending frequency (daily or weekly) and an email using this template will be automatically sent into the platform for analysis either daily or weekly.
Set Alerts
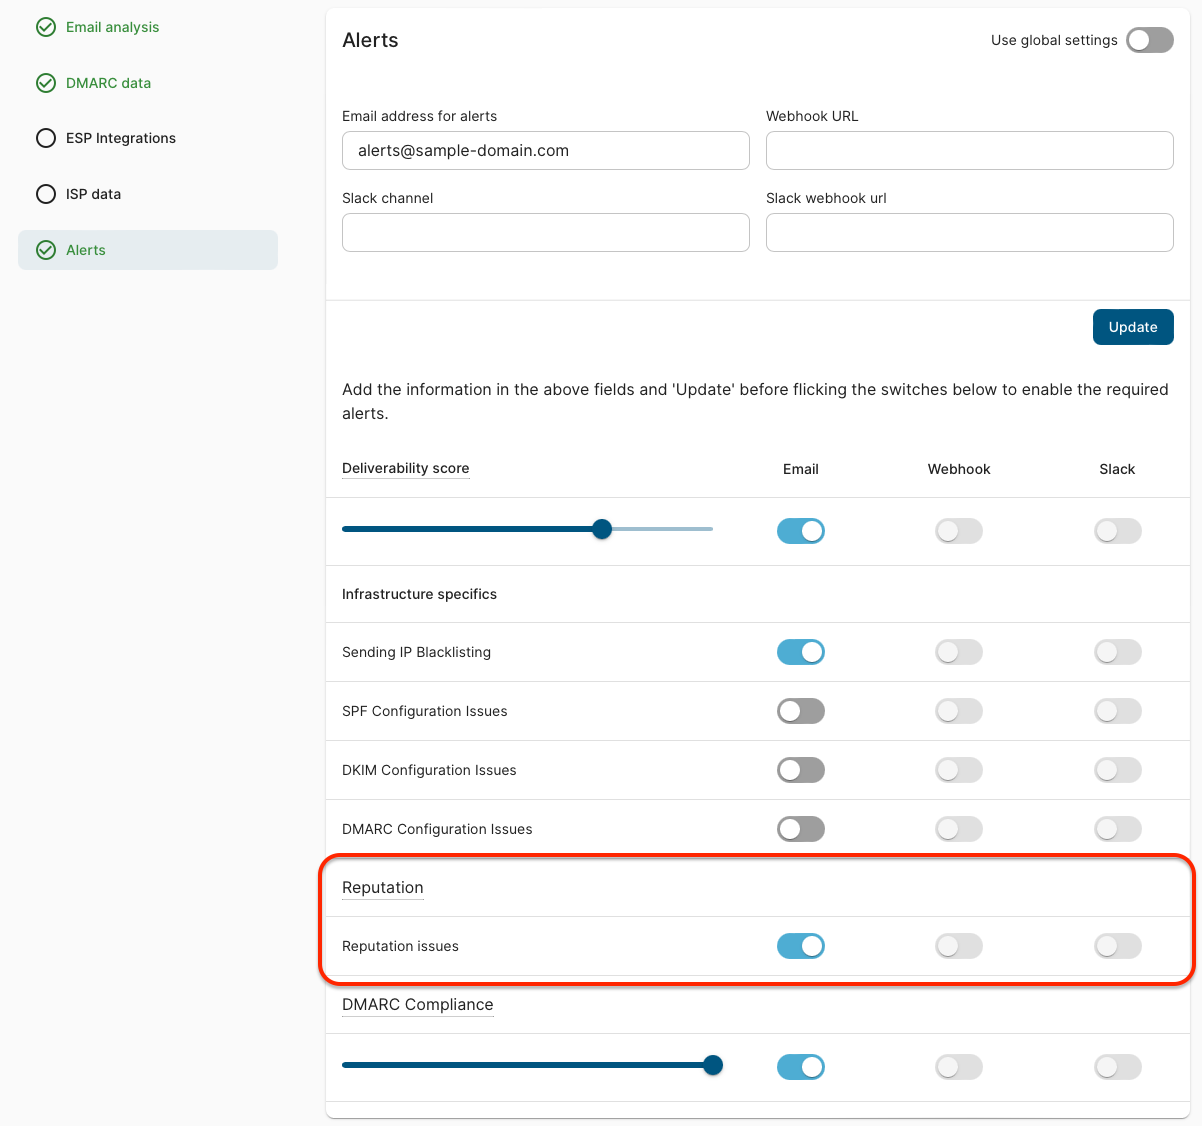
Set automated alerts based on the results of the analyses of these emails received (including the analysis of your live engagement data from these transactional/marketing-automation chanels). These can be set either per sending-domain or globally on the Domain Settings page, and will make sure you know immediately if there is a problem with this sending channel:
4. Enjoy using the new workflow!
Campaign sends (one to many)
Each time you create a new campaign and are ready to send live, first send a test to your unique SendForensics analysis address for pre-emptive deliverability analysis.
After receiving it, the system will process your email and display the full deliverability analysis results within your (SendForensics) dashboard. It will be marked as a 'Test' send where detected (if it is mistakenly marked as a 'Live' send, use the Test/Live switch to correct it).
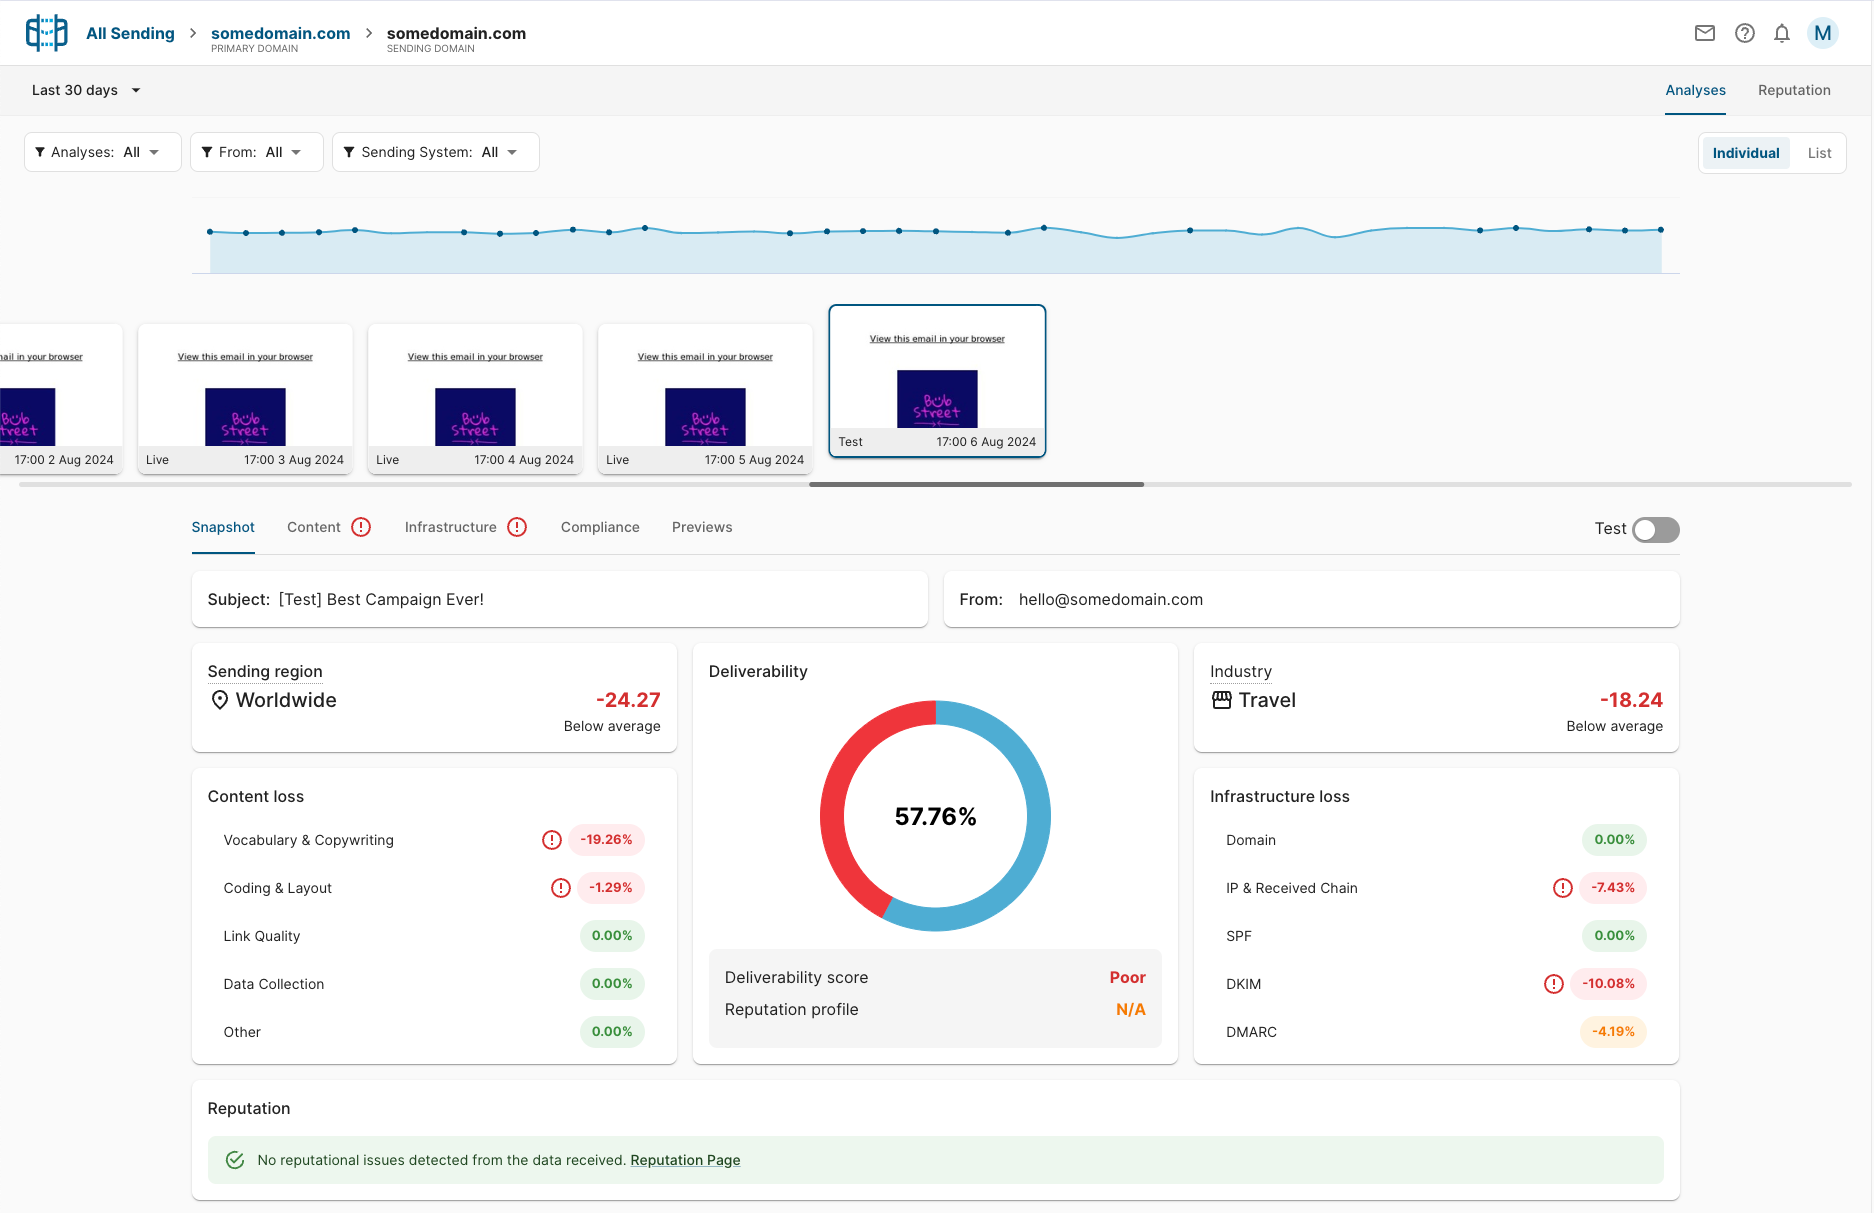
Cycle through the tabs (Content, Infrastructure etc) following the advice and recommendations to optimize the deliverability of your email as much as possible, re-testing as necessary. When you have reached a comfortable deliverability score (vs amount of work needed to improve it further), the campaign can be sent live.
Make sure the live send is also sent to your unique SendForensics analysis address and the resultant live analysis will additionally contain an analysis of your engagement data (live results):
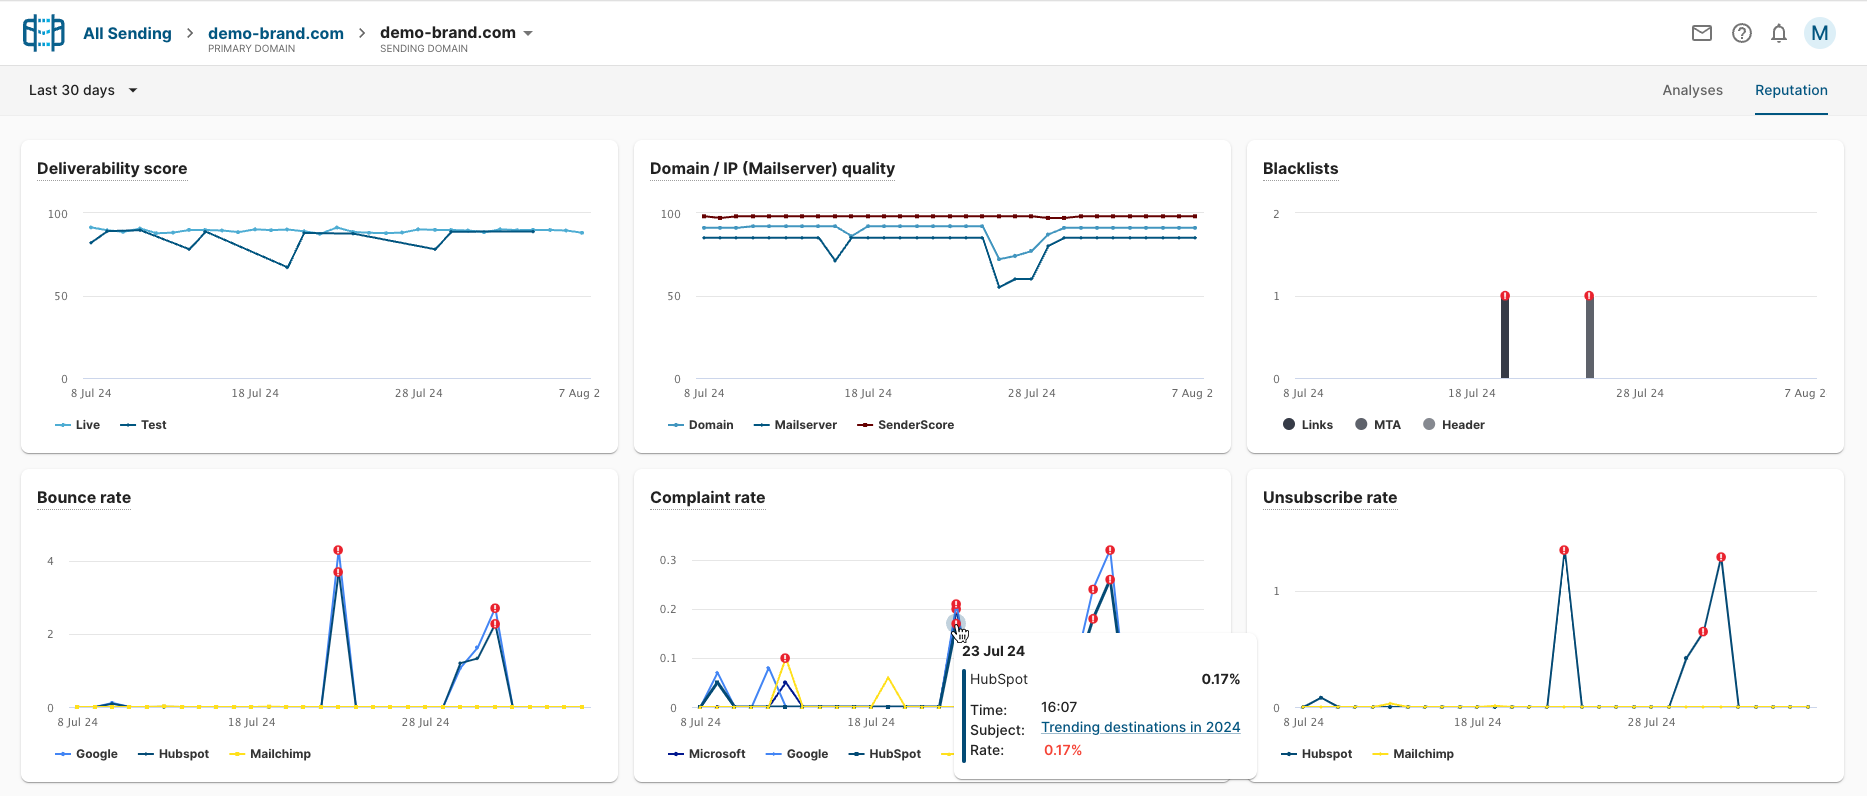
Click on any of the bounce/complaint/unsubscribe graph points to click through to the campaign email responsible for those results. Any reported issues with these metrics especially should be acted on and corrected before the next live send.
Transactional/marketing-automation sends (one to one)
Once the automated template triggering has been set up you should be able to see a constant flow of the various transactional and/or marketing-automation messages being received by the platform for analysis and monitoring.
Some suggested actions for maintaining effective deliverability for these streams are as follows:
- Respond to any alerts triggered by the analyses of these emails, especially alerts on high bounce/complaint/unsubscribe rates from the engagement data (where available).
- If you modify a template, or add a new one, be sure to send a test in for analysis by the system and correct any issues with the content or infrastructure before enabling for your live audience.