Connect Microsoft SNDS data
If you send from a Dedicated IP, you can apply to receive data on your reputation with the Microsoft email ecosystem.
Step 1. Go here and login: https://sendersupport.olc.protection.outlook.com/snds/. You will need to log in with any kind of Microsoft account (sign up here if you do not have one: https://account.microsoft.com/account).
Step 2. Enter the dedicated IP address(es)/blocks you would like the data for (take note of the authorisation procedure in the FAQ).
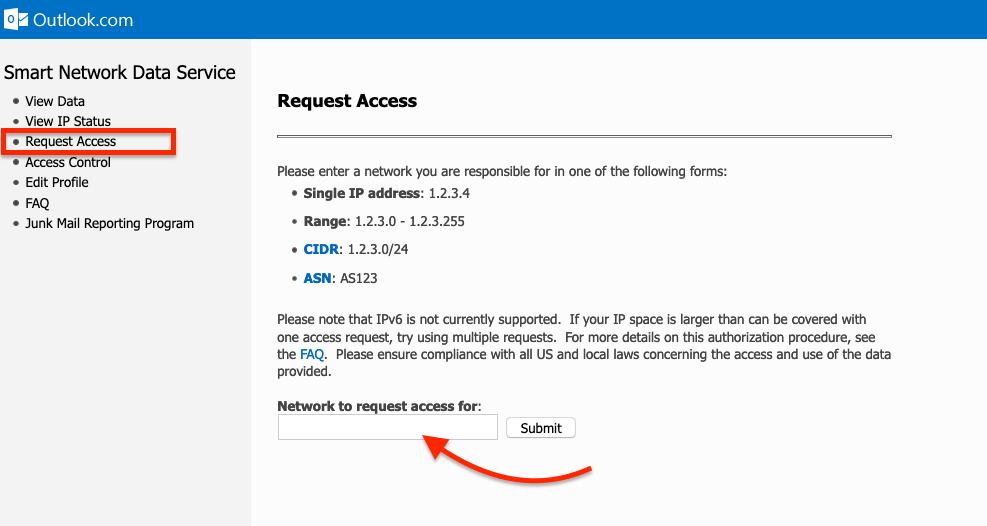
If you get an error message from Microsoft such as "We're sorry - an error occurred", then contact your ESP/IP-owner for additional authorisation.
Step 3. Once authorised, enable automated data access, then copy the alphanumeric access key (from the end of your data access URL):
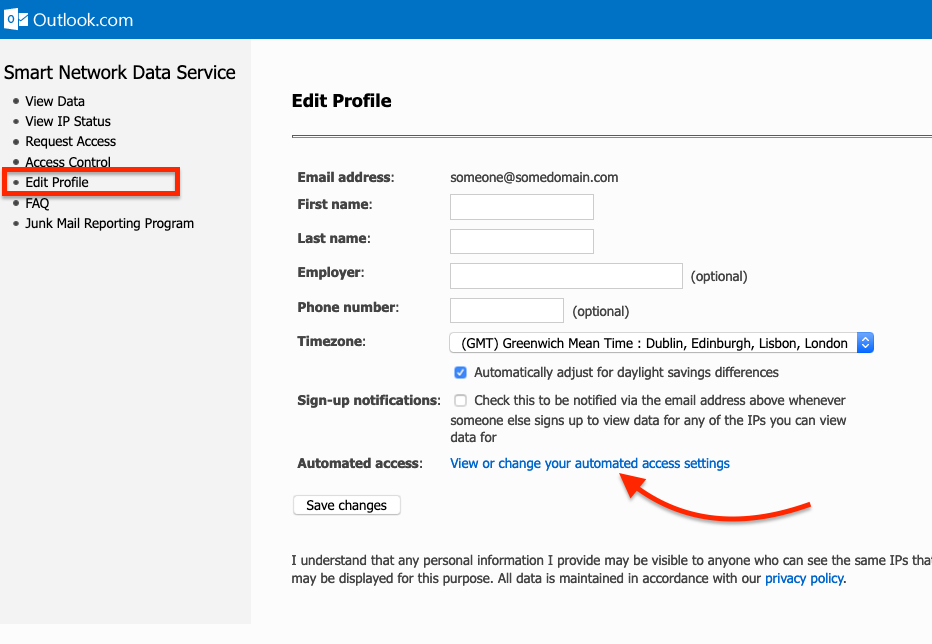
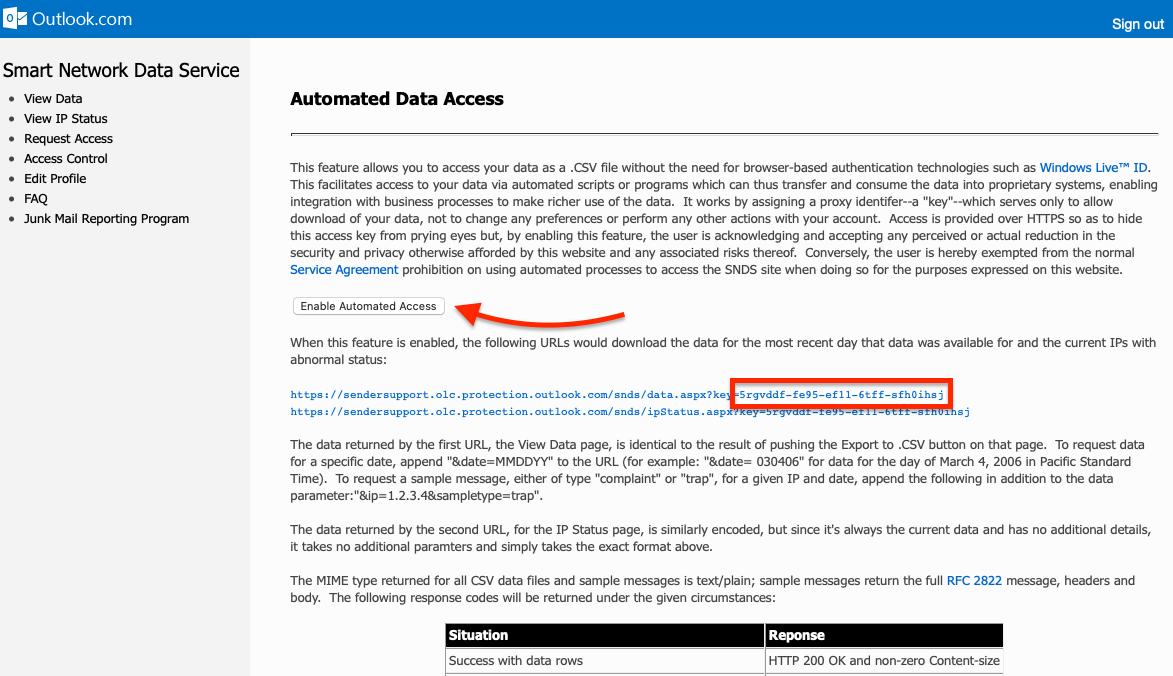
Step 4. Paste this key into the input field on your SendForensics feeds page (see Account > Domains, Setup > ISP Data).

Please note: If you have multiple separate sending-domains sharing the same dedicated IP e.g. domain.com, email.domain.com and crm.domain.com, you will need to paste the same access key into all their feeds pages (see Account > Domains, Setup > ISP Data) for the data to populate for all.
That's it! Now you will see Microsoft SNDS data directly within your dashboard whenever you have enough activity across Microsoft mail services from your IP (complaints, spam trap hits, total blocking).